Once in awhile, we want to record our computer screen so we can send it to someone or do whatever we want with the recorded video. Did you know VLC Media Player has the feature built-in by default?

How to record your computer screen using VLC Media Player
Here are the steps to record your computer screen using VLC Media Player:
Open Capture Device
Open your VLC Media Player then click on media on the menu bar then open capture device.
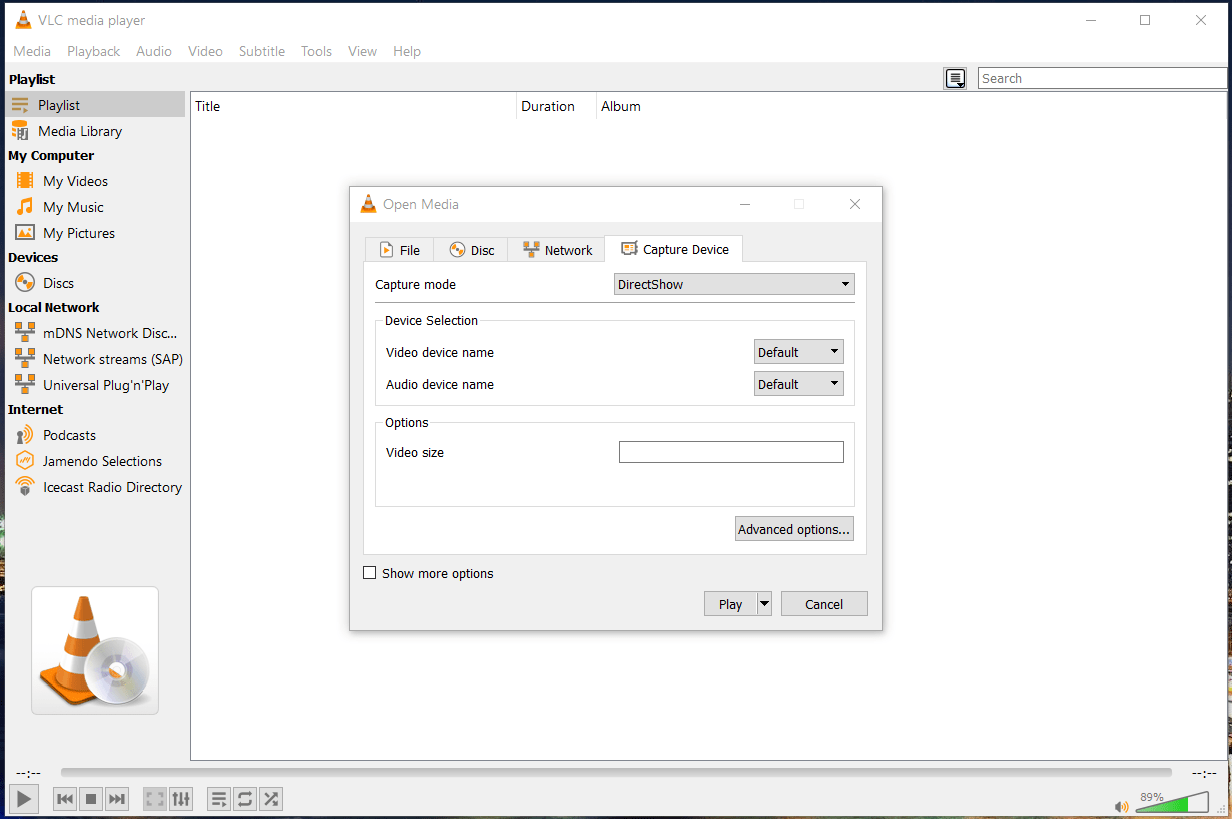
Select Desktop
Select Desktop from the capture mode. This step will allow you to capture whatever that you want to capture. For this step, you will select Desktop.
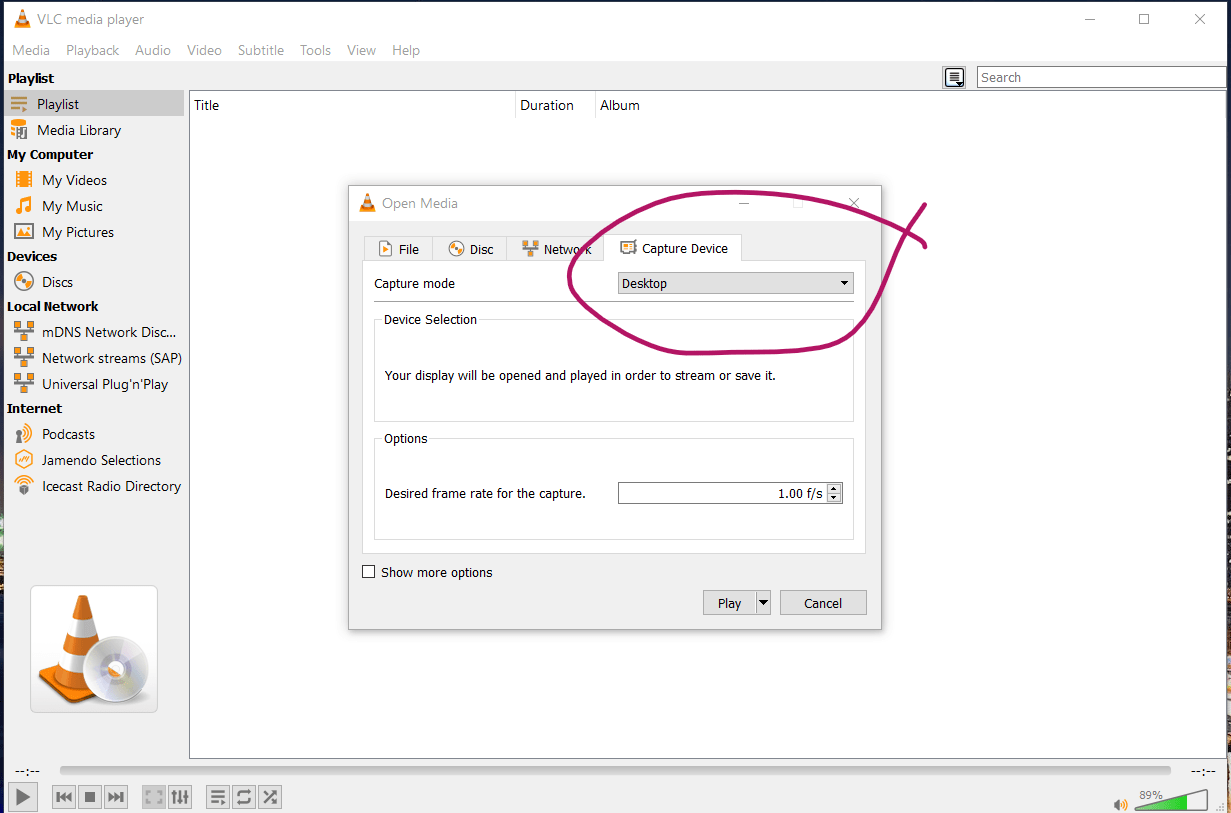
Choose the Frame Rate to Record your Video
This would typically be 30 frames per seconds(fps) but 60 is much better. The higher the frame rate the smoother the video. 60 frames per second is smoother than 30 frames per second hence a generally better video. 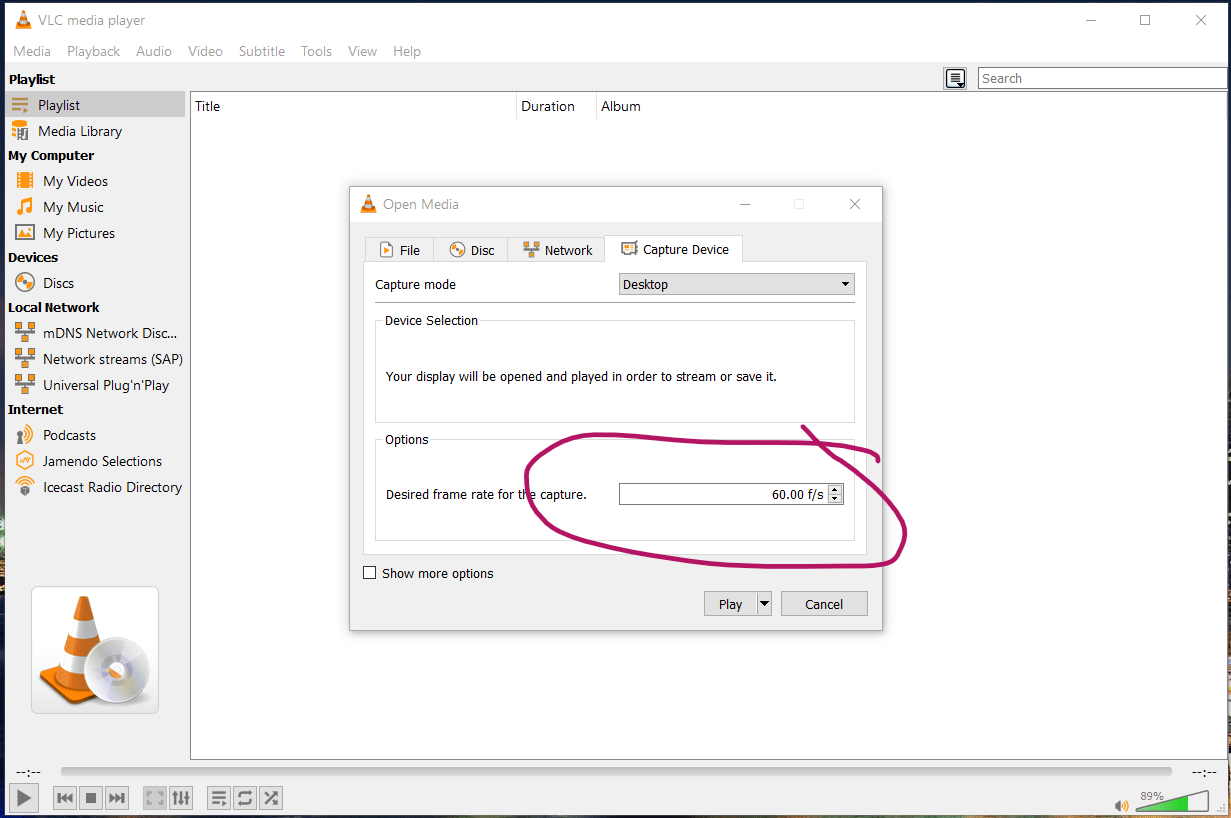
Choose Convert
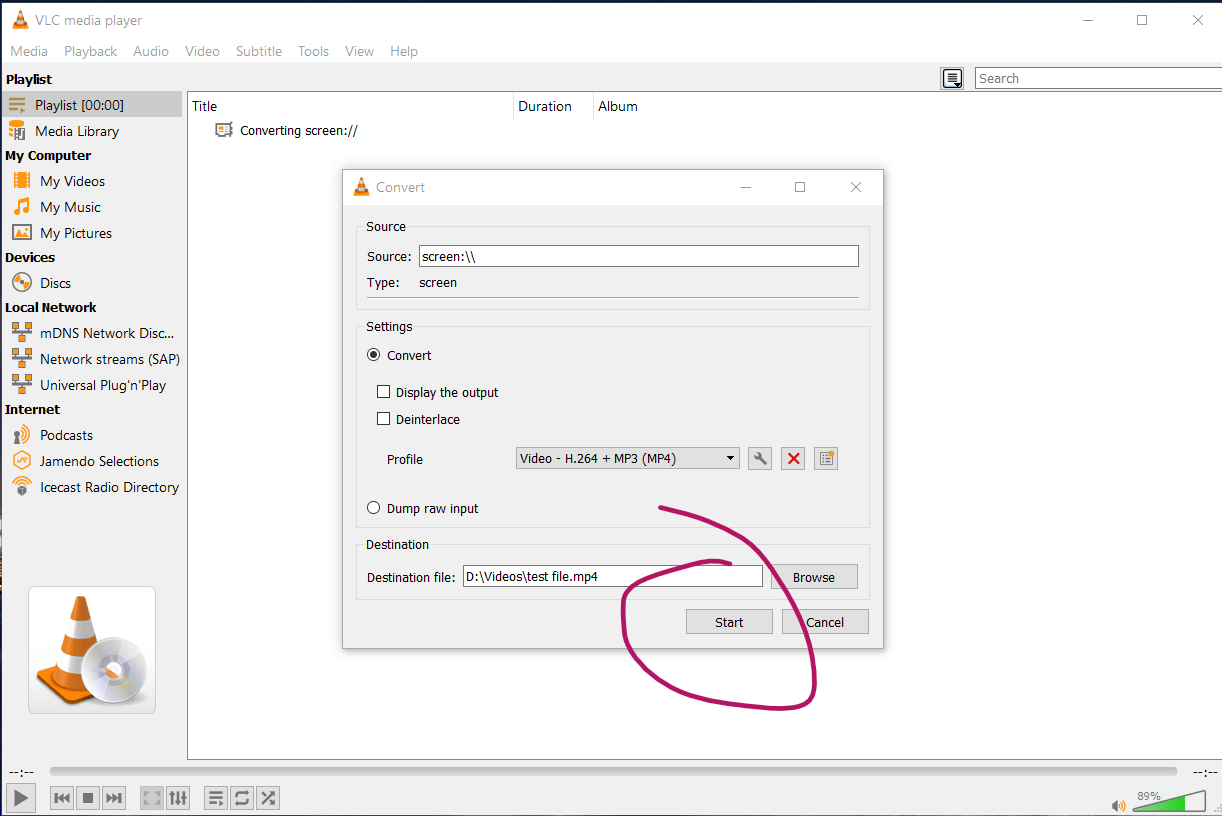
From the drop-down option that shows play, choose Covert then click on it as if you want to show convert. A convert window will pop up.
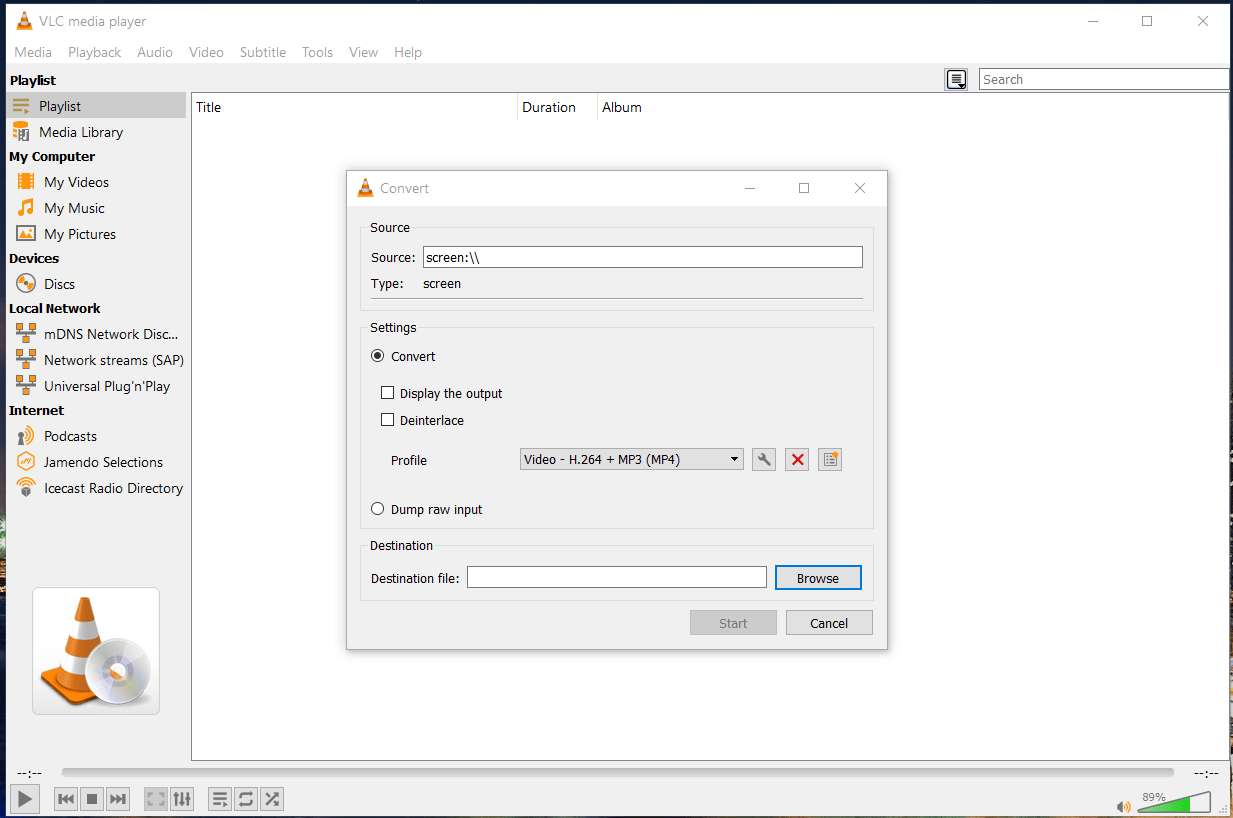
Choose File Format
From the profile section in the Covert window, select the format you would like to save your recording as. I normally choose “Video – H.264 + MP3(MP4)“.
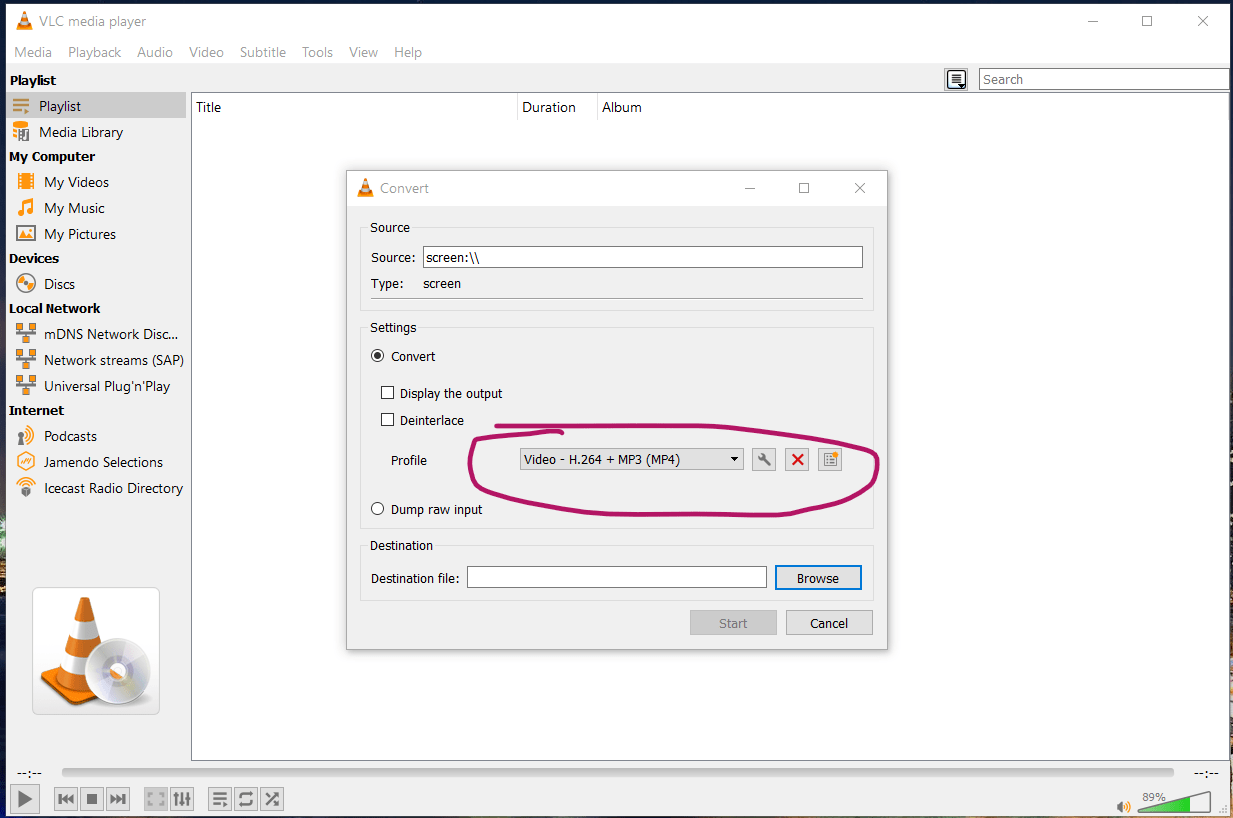
Choose Destination File and Name your File
Select a location to store your video. This is in one of your storage devices. It could be internal, plugged in a flash drive or over the network. Give a name to your file in the file explorer window that pops up then click save. 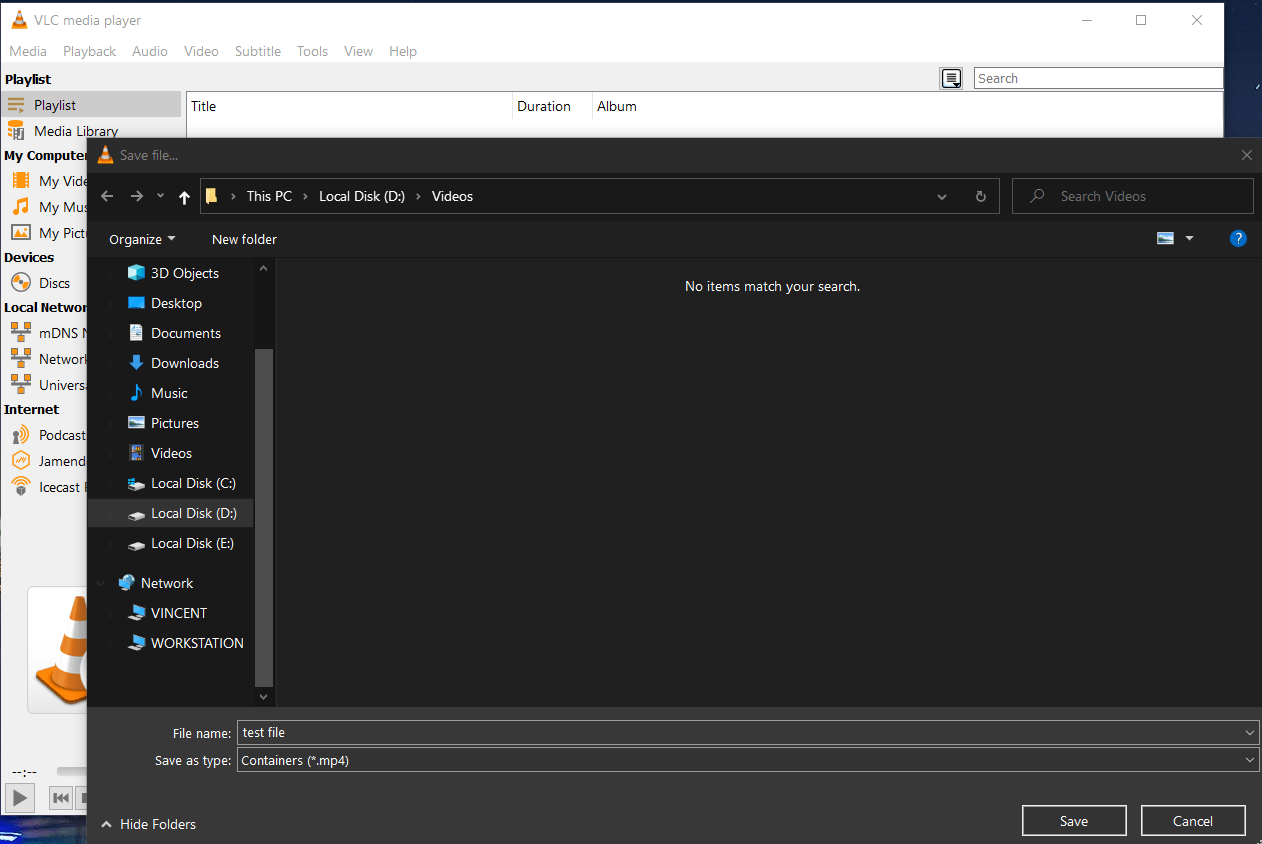
Start, Pause and Stop your Desktop Recording
Click start to start recording your desktop recording. You can pause and finally end the desktop recording by clicking the appropriate VLC buttons. You will find the file in the location you picked in the step before, 6.
