For close to a decade, the only way to run Android apps on a Windows computer was to use BluStacks. This largely worked though it was quite a hustle at times, especially for low-spec laptops. This however changed when Microsoft launched Windows 11.
Windows 11 includes Windows Subsystem for Android (WSA) and this enables Android apps installation. There’s official support for Android apps from the Amazon Android app store but there is no official support for Google Play Store and that is where I come in; Installing Google Play for you to have access to the biggest collection of Android apps.
How to install Google Play on Windows
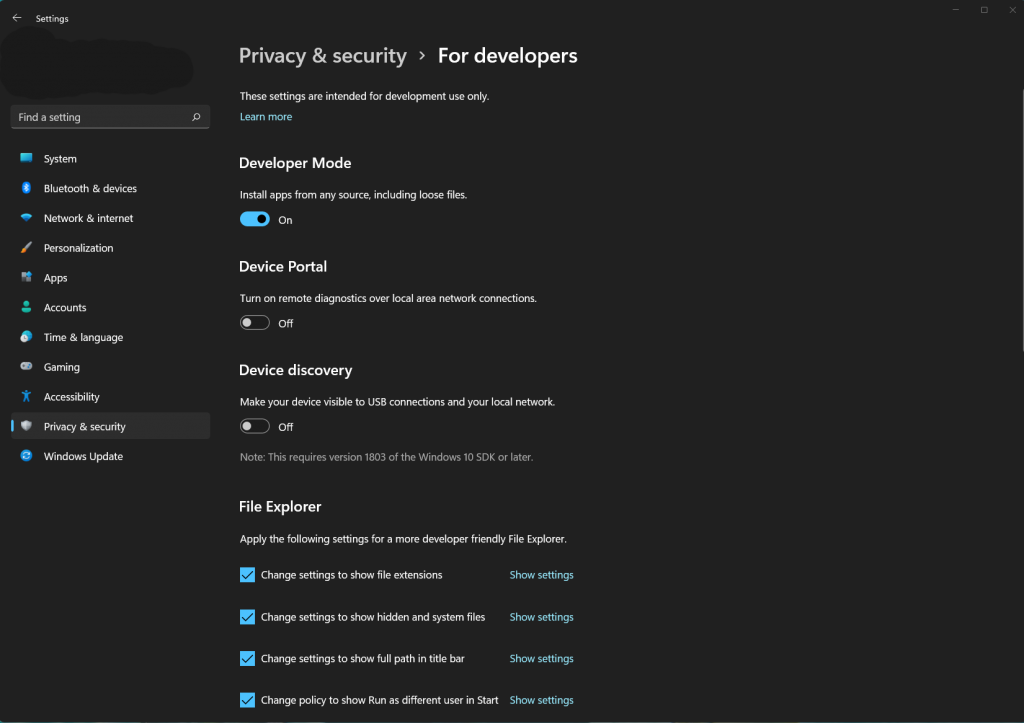
Enable developer mode on Windows 11
Navigate to Settings > Privacy & security > For developers then turn on Developer Mode.
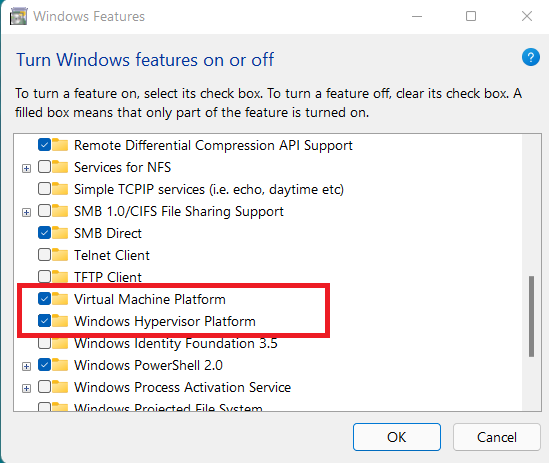
Turn on Windows Features
Search for ‘ Windows Features‘ in your windows 11 system search box then enable Virtual Machine Platform and Windows Hypervisor Platform.
Enable Virtualization in Your BIOS
Check to ensure Virtualization is enabled in your BIOs. For AMD systems, this is called SVM while Intel calls it Virtualization Technology. Enable since this comes disabled by default. Various motherboard manufacturers have different ways of getting to the motherboard BIOS but generally rebooting then pressing f2 or delete should get you there. Follow your computer’s instructions on the boot screen to get to BIOS.
Download Google Play SystemDownload Google PLS to your computer then copy the path to the folder. I have placed this folder under C:Android for easier access.
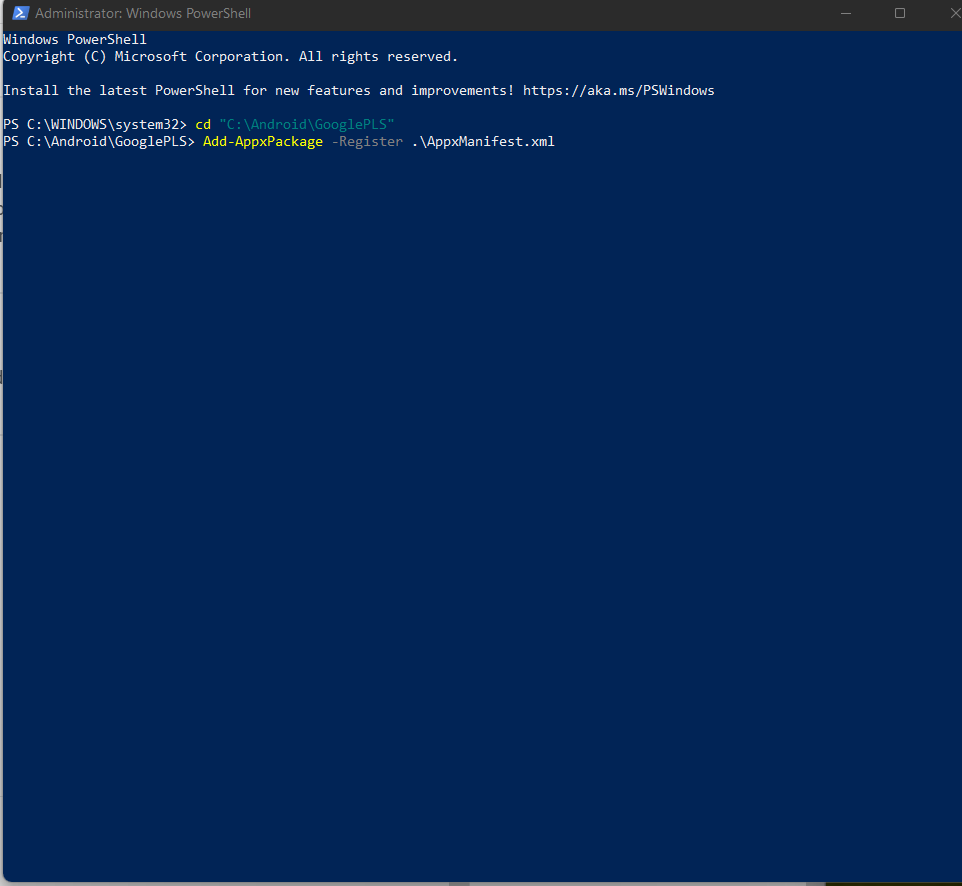
Install Windows Subsystem for AndroidOpen Powershell as administrator then enter the following commands:
cd “C:AndroidGooglePLS” this is the path you copied from step 4.
click enter
Add-AppxPackage -Register .AppxManifest.xml
click enter
Windows Subsystem for Android should be Installed and you can find it under recently installed apps.
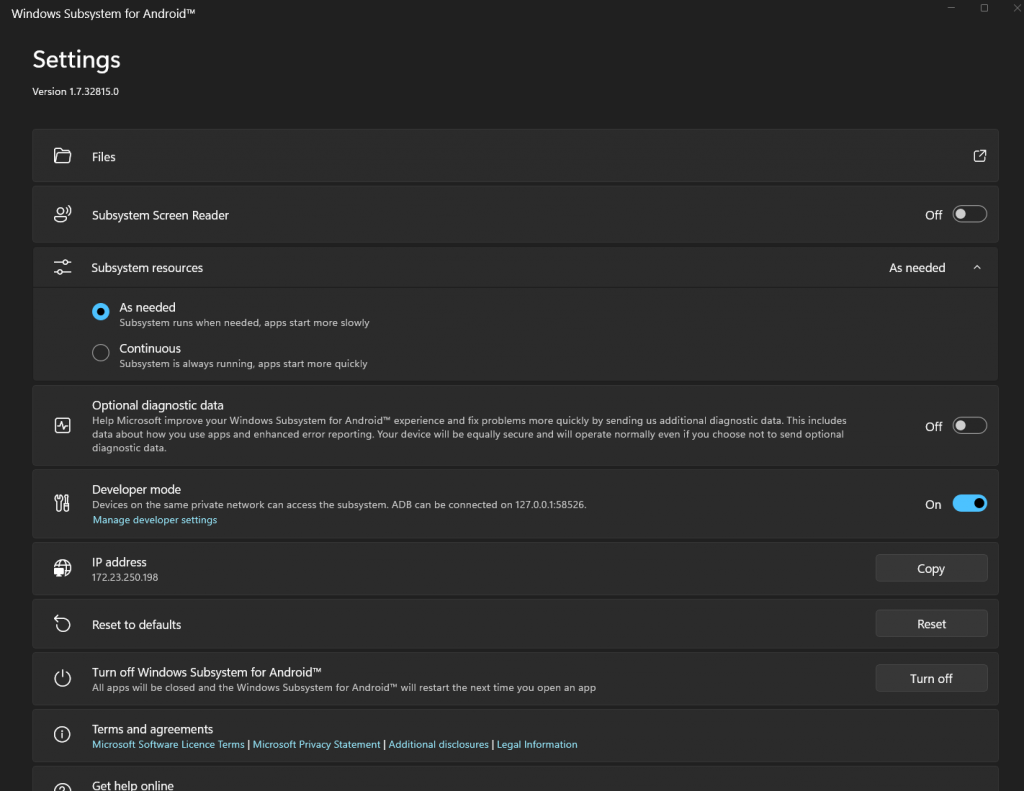
Enable developer mode under Windows Subsystem for Android
Launch the app then enable developer mode. click on manage developer mode then click Continue.
Google play store will install in your system. Give it some time to install and configure itself.
Refresh IP address.
Connect Platform Tools
Extract platform-tools zipped files to a folder, preferably inside the Android folder that you created earlier. Mine is located at C:Androidplatform-tools.
Note: Do not close the two Windows Subsystem for Android windows till you are done with the steps below.
Open command prompt then navigate to this folder. You can use the command below if you have it under the same folder like mine.
cd C:Androidplatform-tools
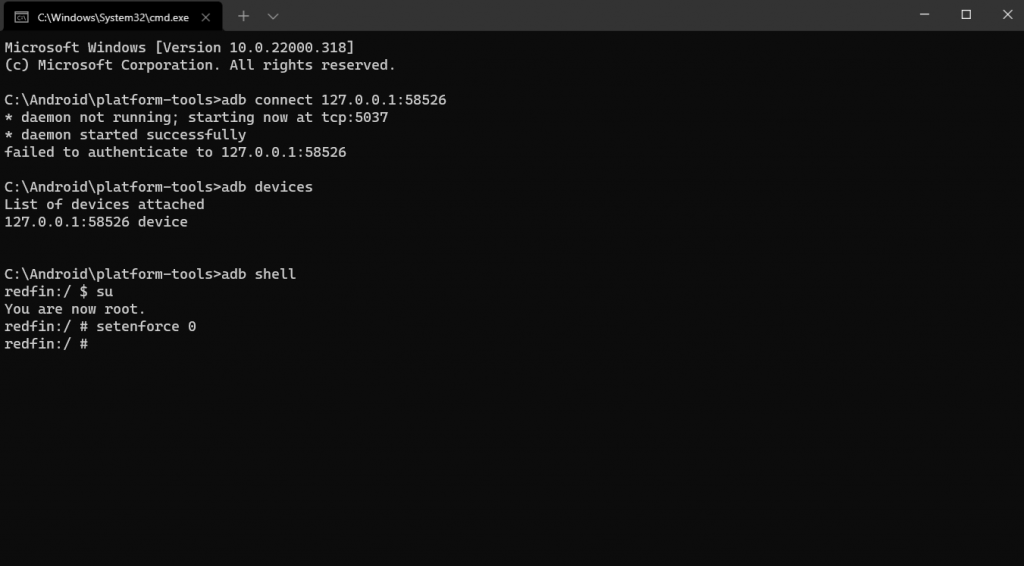
Connect to ADB by typing in the command below, press enter once each command is entered.
adb connect 127.0.0.1:58526
adb devices
adb shell
su
setenforce 0
Sign in to Google Play Store
Sign in with your Google account to the Google play store. Install any app from Google Play Store as you would always do on your Android device.
Google services will install in the background as you sign in. Wait for everything to install so you can have a complete experience.
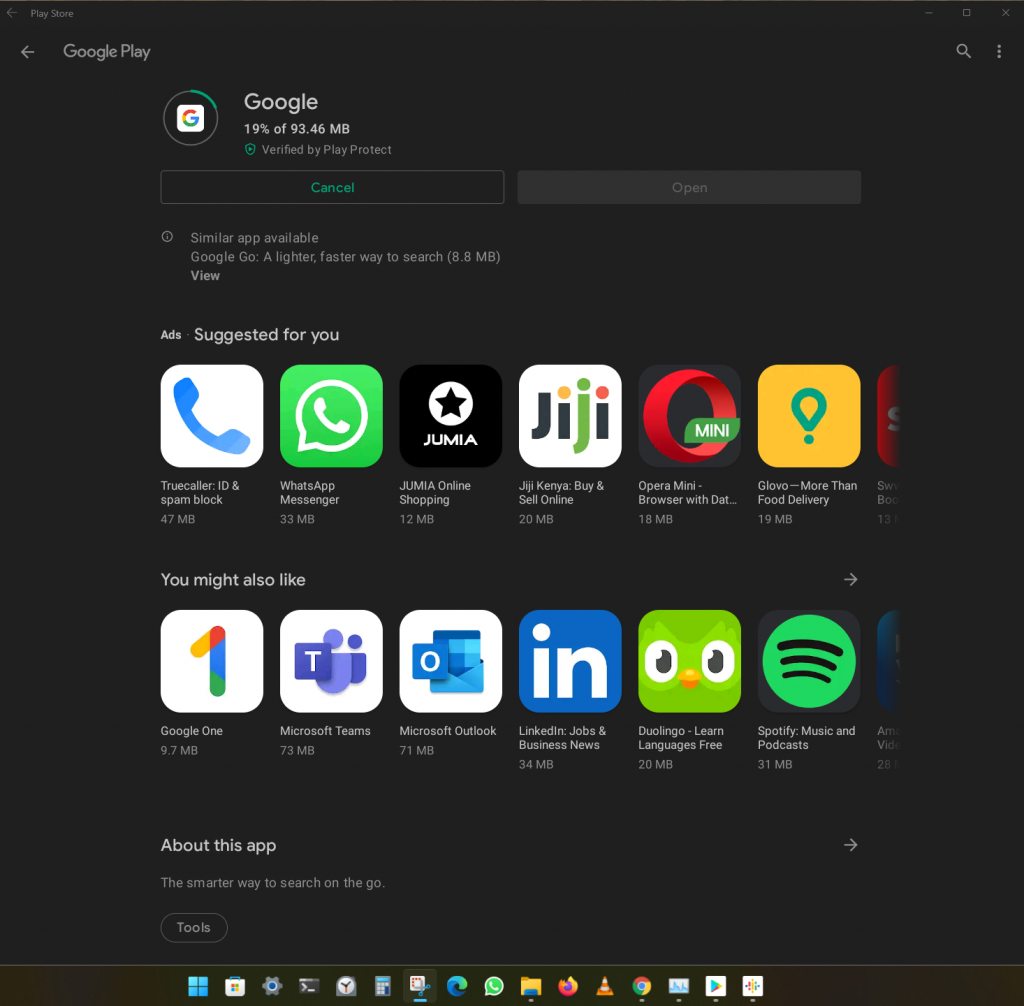
Installing Android apps of Windows 11 is that simple now.
