An Android TV is an excellent choice for anyone looking for a smart television that can do more than just display content. With its built-in Wi-Fi and Ethernet connectivity, you can easily stream movies, TV shows, music, and other online content directly to your TV without the need for additional cables or devices. Additionally, Android TVs come with a range of features such as voice control, Google Assistant integration, and access to popular apps like Netflix, Hulu, and YouTube. Whether you’re a casual user or an avid gamer, an Android TV has something for everyone.
Setting up and connecting your Android TV to Wi-Fi is a straightforward process. Here’s a general guide, but keep in mind that the exact steps may vary slightly depending on your TV model and the version of Android TV it’s running. Always refer to your TV’s user manual for specific instructions.

Step-by-Step Guide to connect your Android TV to Wi-Fi
1. Turn on your Android TV:
Make sure your TV is plugged in and powered on.
2. Access the Settings:
Use your remote control to navigate to the Settings menu. This is usually represented by a gear or cogwheel icon.
3. Navigate to the Network settings:
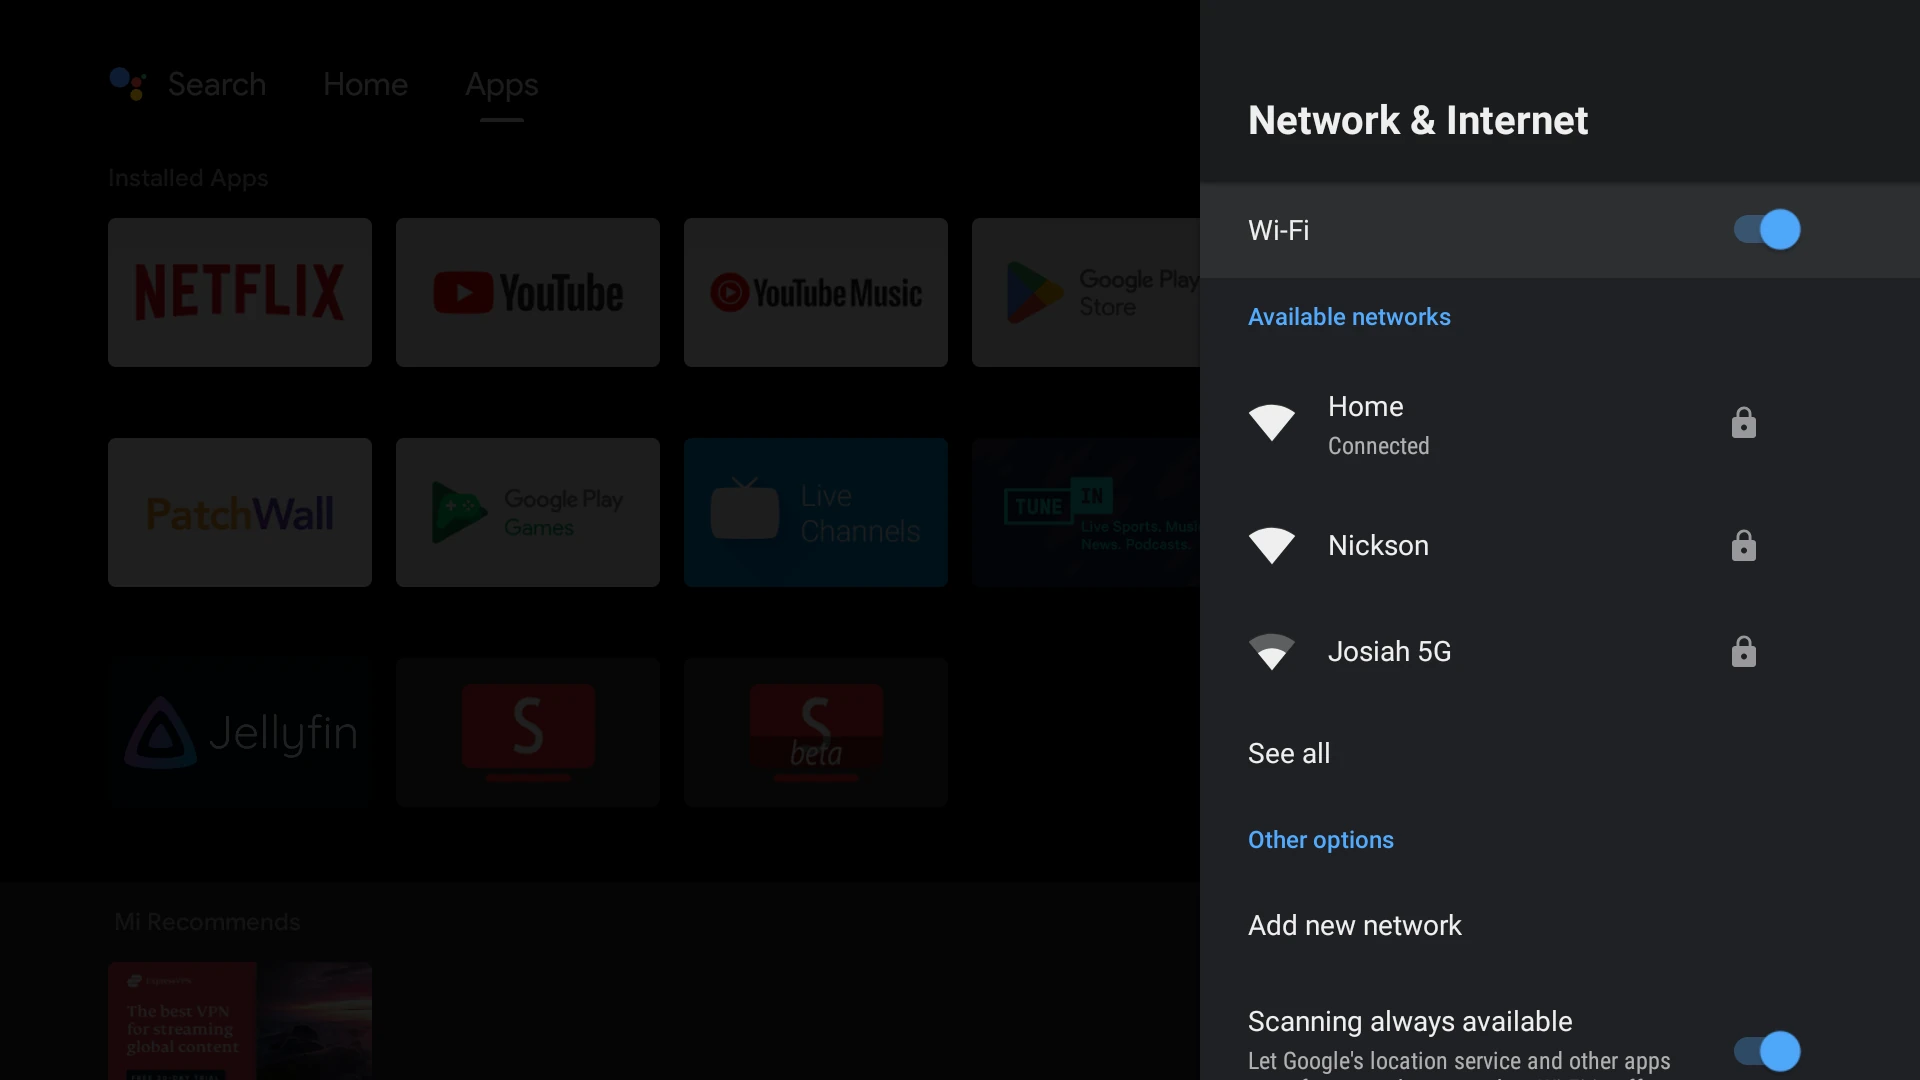
Within the Settings menu, locate the “Network” or “Network & Internet” option. It may be located under the “Device Preferences” or a similar section.
4. Select Wi-Fi:
Choose the “Wi-Fi” option to access the Wi-Fi settings.
5. Turn on Wi-Fi:
If Wi-Fi is not already enabled, toggle the switch to turn it on.
6. Scan for available networks:
Your Android TV will scan for available Wi-Fi networks. Once the scan is complete, a list of networks should appear on the screen.
7. Select your Wi-Fi network:
Find your Wi-Fi network in the list and select it. If your network is hidden, you may need to choose the “Add network” option and manually enter the network name (SSID) and password.
8. Enter Wi-Fi password:
If your Wi-Fi network is secured, you will be prompted to enter the network password. Use the on-screen keyboard to input the correct password.
9. Connect to the Wi-Fi network:
After entering the password, select “Connect” or a similar option to establish a connection to the Wi-Fi network.
10. Wait for the connection:
Your Android TV will attempt to connect to the selected Wi-Fi network. Once the connection is successful, you should see a confirmation message.
11. Test the connection:
To ensure that the connection is stable, you can open a built-in app or navigate to a streaming service to test if your Android TV has internet access.
12. Update software (if necessary):
It’s a good idea to check for software updates in the Settings menu. Ensure that your Android TV has the latest firmware to benefit from improvements and bug fixes.
Setting up and connecting your Android TV to Wi-Fi and Ethernet is a crucial step in getting the most out of your smart television. With these connections, you’ll be able to stream movies, TV shows, music, and other online content directly to your TV without the need for additional cables or devices. Additionally, Android TVs come with a range of features such as voice control, Google Assistant integration, and access to popular apps like Netflix, Hulu, and YouTube.
Whether you’re a casual user or an avid gamer, an Android TV has something for everyone. With its built-in Wi-Fi and Ethernet connectivity, you can easily switch between streaming content over the internet and using your home network to access local files and media servers. This makes it easy to stay connected and entertained at home, no matter what your preferences are.
If you’re new to Android TVs, setting up Wi-Fi and Ethernet connections may seem daunting at first. However, with the simple steps outlined above, you can have everything set up and running in just a few minutes. Once you’ve completed the setup process, you’ll be able to enjoy all of the features and capabilities that your Android TV has to offer.
Overall, setting up and connecting your Android TV to Wi-Fi and Ethernet is an essential step for anyone looking to get the most out of their smart television. With these connections, you’ll have access to a wide range of online content and features, making it easy to stay connected and entertained at home.
So why wait? Follow the instructions above to get started with your new Android TV today!
